As a WordPress website owner, you might be familiar with OptinMonster. It’s often included as a suggested add-on to many web hosts, like Hostinger.
Much like with Windows and unknown programs, it’s easy to write off OptinMonster as bloatware slowing your website down. But is it really? Is OptinMonster worth looking at, and what does it do?
In this OptinMonster review, you’ll find out whether this lead generation tool is worth your investment.
What is OptinMonster?

OptinMonster is a WordPress-based lead-generation tool. The company was co-founded by Thomas Griffin, who is known for another WordPress plugin: Soliloquy. The other half of this team is Syed Balkhi, a co-founder known for WP Beginner.
The combination of these two well-known names in the WP community means the team behind OptinMonster has a lot of talent. The connected talent and close ties with WordPress mean you’ll find it partnered with multiple web hosts.
If you are like me, you might’ve removed it right away. But there’s a lot of value behind the tool, which is affirmed by the company’s support for over one million sites. It’s arguably the largest optimization tool on WordPress.
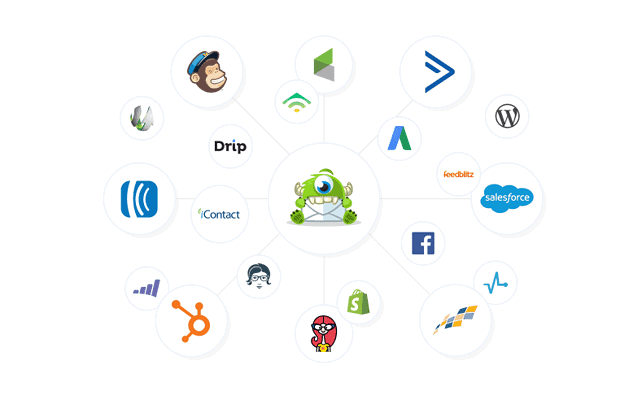
OptinMonster is also connected with a sister tool: Monsterinsights, which provides data on site visitors, how long they stay, and ways to convert them. The two tools are often paired, but we’ll focus on OptinMonster.
Who is OptinMonster best for?
OptinMonster is best for small to medium businesses who want to work towards more conversions on their website. The company has plans for site views ranging from 2,500 to over 100 thousand, varying in cost depending on the features and number of site views you want.
OptinMonster isn’t a tool for creating more viewers but for directing your current viewers. If you struggle to get your first visitors, you might work with other tools besides this.
OptinMonster pros and cons
Pros
- Plans start at $9 per month
- A free version is available (OptinMonster Lite)
- Unlimited subscribers and campaigns
- It’s easy to create professional-looking campaigns
- Compelling targeted campaigns let you target everything imaginable
- Numerous integrations with email service providers
- Huge number of helpful integrations
- Playbooks can help simplify using the campaign editor
- Secondary dashboard for those who own multiple websites
Cons
- Scalability has limited usefulness after 100 thousand visitors per month
- No lifetime plan
- No free trial for the pro version
- The company makes it difficult to find out pricing options
- OptinMonster branding is still on the second-level plan
- Limited page views
- Customer service is limited to lower two tiers
- Fewer customization options than other page-building tools
- You need the pro plan to get access to more advanced tutorials
- There are numerous unnecessary links on the WP menu
- Limited customer service for those who pay less
OptinMonster pricing and plans comparison

OptinMonster provides four different plans you can choose from:
- Basic – $108 annually (or $19 monthly)
- Plus – $228 annually (or $39 monthly)
- Pro – $348 annually (or $59 monthly)
- Growth – $588 annually (or $99 monthly)
All four plans come with access to OptinMonster University (the company’s learning management system) and a done-for-you campaign setup, a campaign set up by one of their staff. That second one is pretty unique to OptinMonster, as you don’t see it given by many WP companies.
You’ll also notice that these plans require upfront annual payments and offer no free trial. OptinMonster provides a refund policy of 14 days, giving you some time to try it out.
Does OptinMonster have a free version?
Now, while OptinMonster doesn’t offer a free trial, it does provide a free version. To get this free version (OptinMonster Lite), you’ll need to search for the program through your WordPress website.

You won’t find it mentioned on the company’s pricing page, and one blog claims that there is no free version. It’s as if this WordPress plugin doesn’t exist on their site.

From this, we can tell OptinMonster doesn’t want you to know about pricing options, pressuring you into paying for a year upfront. You can tell this with the monthly options, which require you to dig through the FAQ to find them.
We won’t call it lying because the information is out there, and the blog might just be a miscommunication. But, we will call it misleading because it’s clear that Optinmonster prefers people not to know about its options.
Below, you’ll find out more about those premium options.
Basic plan
The basic plan costs $9 per month if you pay yearly. It comes with these features:
- Support for 2,500 page views and one site
- Unlimited campaigns and people for your list
- Support for basic features (lightboxes, floating bars, forms)
- 300+ design templates with support for custom fonts or styles
- Basic integrations like MailChimp or SendinBlue
- Access to software that helps you track leads
- Training and support
The basic plan is for people who don’t need a lot out of their tools. While it has all the building features, it lacks some of the more advanced features of later plans.
The basic plan is also unavailable if you don’t purchase it through the site. If you upgrade through the WP plugin or after creating an account, the only plans available are the Plus, Pro, and Growth plans.
Plus plan
The plus plan costs $19 per month if you pay annually. It comes with these features:
- Support for up to 10 thousand page views and two sites
- Advanced features (like A/B testing, sound effects, and animation effects)
- Advanced targeting rules
- More integrations (GetResponse, ConvertKit, Drip, etc.)
- The ability to store campaigns in an archive
The plus plan is ideal if you want a few more advanced features, but don’t have a lot of page views yet.
At this level, OptinMonster still hasn’t removed its branding. So, anyone who sees your popups will know you use OptinMonster.
Pro plan
The Pro Plan costs $29 per month if you pay annually. It comes with these features:
- Support for up to three sites and 25 thousand page views
- The removal of the OptinMonster badge
- Mobile-specific campaigns, countdown timers, multi-step campaigns (like sales funnels), and advanced tagging.
- More advanced targeting rules and features
- More integrations (HubSpot, Zapier, Webhooks, etc.)
- Campaign scheduling, sub-accounts
- Live chat support
- Access to optional add-ons
The pro plan is the first plan that lets you remove OptinMonster’s branding. This is more expensive than other branding removals.
Its most handy feature is targeting based on cookies, referral traffic, and device type. So, if you want advanced data features, the pro level is ideal.
Growth plan
The Growth Plan costs $49 per month if you pay annually. It comes with these features:
- Support for 100 thousand page views and five sites
- More advanced campaigns (like coupon wheels, action scripts, and custom messaging for those who have already opted in)
- Custom branding and JavaScript feature
- Targeting based on geolocation and real-time personalization
- Advanced eCommerce integrations (like Magento, WooCommerce, or BigCommerce)
- Unlimited sub-accounts and client login access (for agencies)
- Premium customer support
The growth plan is your best bet if you are an eCommerce business owner. You’ll also find some more advanced targeting features. The optional widgets, like the wheel spin popups, are also made available here, which feels less valuable.
You’ll also find a lot of different optional add-ons, causing the cost of this product to add up pretty quickly.
Getting started with OptinMonster for free

You can get started with OptinMonster by installing it directly from your WordPress site. This is easier than some plugins that prefer you download the file and upload it to your WP site. It also lets you avoid paying for a bit.
All you need to do is scroll down, select “add new” under plugins, and search for OptinMonster, downloading and activating what will likely be the first result. You’ll know you have the right logo when you see a one-eyed monster chewing on a letter.
From there, OptinMonster will bring you through the account creation process. It will ask you for a payment card but only charge you once you pick a plan. You don’t have to choose a plan when creating an account through this method.
Once you finish activating your account, you can start building. You’ll see the dashboard (image above) to get started. When starting with the dashboard, you’ll see options to create many popup types.
Selecting “create new” brings you to templates, letting you build your first popup. You’ll find out more about that in our features section.
OptinMonster WordPress plugin – features
In our features section, we’ll be breaking everything down in order. If you install the program for your site and follow down, you’ll get a step-by-step breakdown of how it works, highlighting the good and bad parts.
Managing OptinMonster campaigns

After the dashboard, the first tab you’ll see is “campaigns.” This lets you see your list of campaigns, create campaigns, copy them, and see their results. Those familiar with WP will find familiar territory for building any pages.
OptinMonster starts you with a simple campaign for gathering emails. Hovering over it will let you edit the design, change the output settings, and change the status.
Clicking “edit design” pulls up the editor, which you’ll find out more about in the next section.
Meanwhile, the output settings let you control who sees it and when. For example, you can control whether it appears on individual posts and pages. Advanced display rules include control over the traffic sources, page tags, and the types of website visitors (return visitors versus new visitors).

Higher-paying customers get access to more advanced tools. For example, exit intent popups are those that specifically appear when customers are about to leave. This is a great time to turn a loss into a gain.
Just to the right, you’ll see some simple statistics showing you the number of visitors to conversion (otherwise known as your conversion rates). You’ll find more detailed analytics by clicking the three-bar icon on the far right.
This page also lets you create a/b tests, helping you create the most personal and meaningful conversation in your messaging.
Clicking “add new” will bring you to the template and playbook creation tools.
Creating different campaigns through the template tab

OptinMonster lets you create various campaign types based on different templates. When selecting your campaigns, you’ve got one of these options:
- Popup – The standard popup or lightbox format that appears over the page.
- Floating bar – A less invasive bar that appears next to the popup.
- Fullscreen – A fullscreen version of a popup that’s more visually demanding.
- Inline – Displays on a specific region of the page as you hover over it (like a button)
- Slide-in – Popups that slide from the sides or corners of your webpage
- Gamified – These are advanced popups that are more interactive (like spinning a wheel to get a prize)
Under the free and basic plans, you’ll find everything but the gamified popups available. The free program has template restrictions you’ll discover by clicking on “use this template” until something works.
Once you find a good template, you’ll finally get access to the builder.
OptinMonster drag-and-drop builder

A big part of what makes OptinMonster popular is its simple drag-and-drop builder. Those familiar with simpler landing page software will find some familiar ground here.
The builder’s display is broken into two halves: the “blocks” and the main editing window.
The left side holds your blocks, which include text, buttons, images, videos, and other normal fields. Some more advanced fields, like the countdown timers, require you to pay for a higher-level subscription.
The smart blocks, which you can find by scrolling down, include blocks that change depending on their need. For example, you can put a progress bar that fills up as the site visitor clicks through your marketing campaigns, encouraging them to go on.
Anytime you want to add a new block, you simply drag and drop the blocks onto your visual window. From there, you’ll see a plus icon where the block will drop.
When you click on anything on the right side, it will change to an advanced display, letting you edit the content and the style.

For example, you might choose a background color, a specific border, or rounded corners. You can also access the same page by clicking the settings cog that appears as you hover over the box.
Double-clicking any text box will let you edit your text. You don’t need to double-click most elements.

When editing advanced fields, like your custom forms, you can edit the form and the fields requested. By default, this data will be sent to your OptinMonster account, which we’ll review later.
If you want your OptinMonster campaign to send this data elsewhere, it requires an advanced subscription and integration with another customer relationship management tool (like HubSpot).
From here, you’ll also be able to create multi-step campaigns, which you can see from the “yes/no” tab at the bottom. This provides excellent opportunities to boost sales or generate leads based on your customers’ needs.
The last tab, your success page, is where you thank your customer for giving their email or buying a product. You’ll always get at least two pages, regardless of your chosen plan.
Setting up how your OptinMonster pages display
The remaining four pages at the top of your OptinMonster building tool are display rules, integrations, and analytics.

Display Rules
Display rules affect when your campaigns appear, not just where your campaigns appear. By default, the free version displays how long the visitor has been on the page and the specific page the visitor is on. For advanced targeting, like a returning visitor or those at a physical location, you need to pay.
These rules include incredibly advanced marketing tactics, which include different areas of conversion, specific devices the visitor is coming from, and whether they’ve converted in response to particular campaigns. Through integration with eCommerce platforms, you can also apply this to whether or not the customer has bought a specific product.
You’ll also notice that the bottom two tabs have changed, showing actions and summary. The actions allow you to add animations and sound effects to make your popups more pleasant. Meanwhile, the “summary” lets you see your full ruleset.
Setting up integrations and analytics for your OptinMonster page

By default, OptinMonster’s one integration is MonsterLeads. MonsterLeads is your built-in CRM. But, if you want advanced integrations or other CRM, you can set it up via the third tab on the top of your design page.
The page above is built to gather emails. So, you can choose the email service provider where all this data is sent. However, it’s still good to keep MonsterLeads as a backup, as they allow unlimited leads.
You can also use OptinMonster to verify your leads through a tool called “TruLead.” This filters emails using AI and blocks leads that might not fit your needs (i.e., only business email addresses if you are a B2B salesperson).
Finally, the last tab, analytics, lets you connect to Google Analytics or use the built-in OptinMonster Analytics.

When you are done with all of these, you can choose to publish. This lets you connect your lead-gathering tools with third-party platforms or integrate them directly with WordPress.
You’ll find a lot of eCommerce integrations here. You can also share this page on social media or copy the HTML and paste it anywhere. The only thing they won’t do is host it for you.
The simple editing process is great for getting things done. If you are a beginner at gathering leads or online sales, you’ll find it handy. But those seeking more customization options in their lead generation software will be a bit disappointed.
Editing playbooks vs. templates on OptinMonster

OptinMonster lets you choose to build based on playbooks instead of templates. What’s different between the two is that playbooks include pre-built rules.
The playbooks are built based on other professional companies, like Woodside Communities and Burt’s Bees, to make them sound impressive. As a result, many of these campaigns are built on rules requiring higher-tier plans.
Not having to think about your plan might help you get started. You’ll also be able to quickly sort through what playbooks work for your current plan.
Navigating the remaining parts of your WordPress dashboard
The remaining parts of your dashboard require a bit less work to explain. Below, we’ll review those remaining parts to let you know how they are helpful and how well they work:

The subscriber’s tab is built to let you track the number of converted leads. This gives you a birds-eye view of what segments are working and which aren’t.
The later two tabs focus on contacts and segments. “Contacts” is a full group with segments that let you sort those contacts by different tags.

The integrations tab lets you view the complete list of integrations available through OptinMonster. While the other integrations tab that’s part of the builder only focuses on email providers, this lets you expand.
Digital marketing agencies and specialists will find integrations with the world’s best platforms. These include customer relationship managers (CRMs), remarketing, and eCommerce tools.
The settings tab lets you adjust the settings. You can also use this tab to create additional user accounts for your collaborators.

The personalization tab gives you a dedicated screen for viewing what different display rules do. You might consider it the short and easy version of the university.
Speaking of that, you also have an easy link to the university. This provides you with a wide range of links to teach yourself how to use the platform.
The one confusing thing about the university is that they limit its access to pro members. Normally, you learn about the platform, which encourages you to use it (not the other way around).

The remaining parts of this tab are, to be frank, utterly worthless. Most of them are ad links (linking you to SeedProd and TrustPulse), their about us page (reminding you why OptinMonster is cool), and the pro edition upgrade link.
Using the other dashboard – Optinmonster

We can’t complete an extensive OptinMonster review without looking at the other dashboard. This dashboard, known as the campaign dashboard, lets you view multiple sites at once and sort your campaigns by folder.
OptinMonster lets you manage these campaigns by website, sorting and finding what you need. It’s also a slightly different format from the WP dashboard, focusing more on the builder, campaign links, the university, access to live chat (or ticket support for lower-tier members), and an upgrade button for non-payers.
Having a different dashboard makes it easy to switch priorities. So, this can be handy for larger owners with two or more websites.
Is OptinMonster the best lead generation tool?
To make a long story short, OptinMonster is an excellent piece of lead generation software. But its actual effectiveness comes from those willing to pay more than $20 per month.
The pro plan lets you target people based on specific rules. For those who want unique campaigns for each visitor, this can be great. The ability to individually target each user by many factors makes this an excellent tool.
The builder, however, is somewhat weak, leaving little in the way of customization options. Those who like details in their editing process will find OptinMonster lacking, especially compared to other simple landing page builders.
But, it’s important to remember that OptinMonster isn’t built for designers. Instead, it’s best for marketers looking for a simple and powerful tool.