Ecwid is one of the weirdest ecommerce platforms, but strange compared to most offerings. A promising sign of this weirdness comes from the Forever Free plan.
Other eCommerce platforms like to get you to pay something, but what is in it for Ecwid?
We will explore that option below and give you a deep analysis of how to use Ecwid effectively to sell online on a brand new or existing website.
What is Ecwid?
Ecwid is an online store format for quickly selling anywhere. It integrates anywhere, not really as a mainline eCommerce website. Instead, people integrate it with their social media pages, blogs, or personal websites.
With Ecwid, you have the choice to create a standalone website or an integrated site with existing popular platforms:
- WordPress
- Wix
- Square
- Amazon
- eBay
- Walmart
Ecwid also brags about having no transaction fee charges, which is an excellent step away from many larger platforms. All this can be done via Ecwid’s intuitive dashboard. But does this translate to a good product? We will find out below.
Step-By-Step Guide to Starting on Ecwid Store Setup
Starting an ecommerce business is a big decision. if you are planning to sell physical products online, Ecwid has a great resource page with product ideas you can consider. check it out here.
Step One: Creating Your Ecwid Account

Creating your Ecwid account starts with entering your full name, email, and password. The system also offers integration with Apple, Facebook, and Google.
Once you decide how to start, it immediately asks you for even more things:
- Where you are shipping from (City, Zip, Country)
- Details about your selling experience
- What type of products you are selling
- Whether you are setting up a store for someone else
- Your current website provider (if you have one)
After inserting this basic information, your account is ready. You can start to integrate your website with your favorite platform.
Step Two: Integrating Ecwid With Your Online Presence
Ecwid has a unique and flexible talent for integrating with numerous sites and social media platforms. Here’s how you get that done:
The Ecwid Plugin any Website
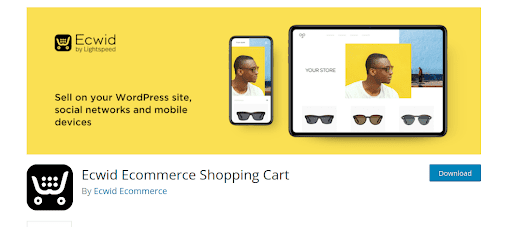
Before you integrate on WordPress, please know that you need to have a WordPress Business Account. Purchase this before you use any available plugins. Once you do that, follow these steps:
- Specify your web address on Ecwid’s Sales Channels page.
- Input your URL in the “store location” by clicking on “specify address.”
- Sign in to WP and install the Ecwid Plugin
- Connect your Ecwid account by selecting “Activate.”
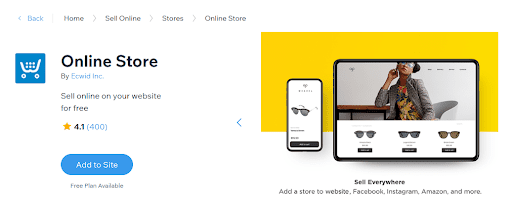
Wix integration is just as easy:
- Add your URL
- Add the Ecwid app to your Wix site
- Click “I already have an Ecwid account” under the login
- Input your login information
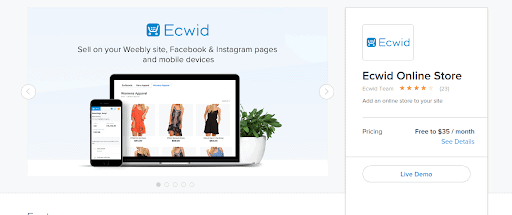
Same with Weebly integration:
- Add your URL
- Install and open the Ecwid App on the Weebly App center
- Follow the steps to create a new count or integrate your new one.
Using Joomla will require you to download an extension file, while other sites (like Squarespace) will need you to acquire an extension code.
Adding the application will automatically add all current products you have. So if you have the demo page, do not publish your site until you’ve modified your product list.
Selling on Social Networks with Ecwid
Ecwid supports three major social platforms: TikTok, Instagram, and Facebook. To integrate with these sites, you will need to pay for the Venture Plan, the least expensive premium plan, at $12.50 /mo.
For TikTok and Instagram, you will need respective “for business” accounts. To use Instagram, you will also need to integrate with Facebook. You cannot have one without the other.
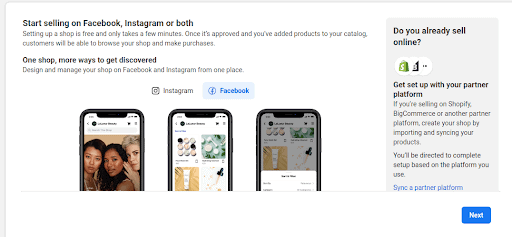
To create a public Facebook Shop, you’ll need a dedicated Facebook page for your shop. Necessary prompts will pop up as you follow these steps for shop creation:
- Go to the “Create Your Shop” page.
- If you live in the US, choose “Checkout on Facebook and Instagram.”
- Create new pages (or select current ones) for your Facebook and Instagram.
- Select a Facebook Business Manager Account
- Know that a catalog will be created manually, confirm your details, and click “Finish Setup.”
- Go through Ecwid’s process.
Ecwid also allows Facebook messenger, which adds a “message us” button to your shop page connecting directly to your public Facebook shop. Be aware that this applies to your off-social site, not your social pages, which already connect to messengers.
TikTok users will need to set up a Pro Account, which requires you to tap “Switch to Pro Account” under “Manage My Account.” Thankfully, TikTok offers this service free of charge.
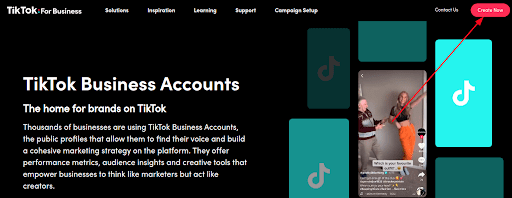
TikTok Shopping accounts are only available in the United States or the United Kingdom. You will also need to establish a seller account for thirty days before you can start selling on the platform. So if you want to create your Ecwid account and immediately begin eCommerce services, you’ll have to rely on other options. We will discuss those below.
Once you wait the required 30 days, follow these steps:
- Go to your Ecwid Admin page for TikTok
- Click the apply button at the bottom
- Fill in the form and wait for two weeks for Tik Tok to approve your account
- Once approval is done, go to the same admin page, scroll down, and click the connection button
Be aware that Facebook and TikTok both have unique requirements for adding products. If you don’t want to deal with either of those and don’t have another personal site, you can use Instant Sites.
Setting Up Your Ecwid Instant Site
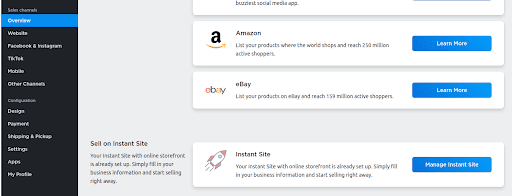
Having an Instant Site gives you another location on top of all the other spots you can sell your products. It is a sidestep to meeting many social media requirements in many ways.
If you already have a social following, you can announce your instant site until you integrate business accounts. You can find your instant place on the “Overview” tab under the “Sales channels” bottom.
You can make the following modifications:
- Adding a custom domain
- Previewing your site
- Performing simple design edits and adjusting headers (i.e., switching out images)
- Adding website content
- Adjusting metatags and verifying your site with Google Search Console (for premium payers)
- Adding a sitemap and allowing search engines to index your site (when ready)
Unlike other sites, there is no theme marketplace to download preset models.
Step Three: Adding Products To Your Site
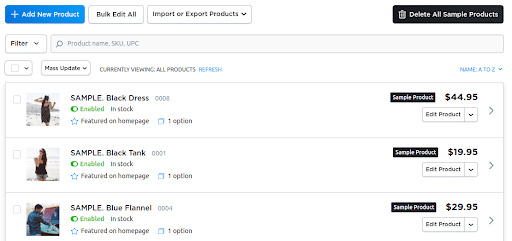
Under “Store Management,” you’ll find a subheading “Catalog,” where you can add and remove your items. Many examples exist under the demo catalog you can use for reference. However, you’ll want to start by clicking “add new product.”
From here, you can add these details under the general tab:
- Images (they have suggestions for different image types)
- Name (Title)
- SKU (Stock Keeping Unit to track your inventory and product details)
- Weight (required for shipping)
- Product description (tell people all the reasons they should buy your fantastic product)
- Ribbon (a label identifying your product with something unique like free shipping)
- Subtitle (an extra short description found on your product list)
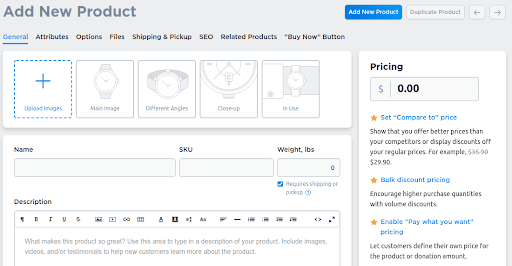
Both ribbons and subtitles need you to pay extra for their use. Additional tabs include the following options:
- Attributes – Details the UPC (for tracking and more product details) and the brand of your product
- Options allow you to select additions to your product to make them unique (i.e., custom monogram slippers instead of regular slippers)
- Variations allow you to define slight variations of the same product (i.e., different colors for your shirt). You need a premium plan for this.
- Files refer to attachments so that you might sell digital products.
- Shipping and Pickup enable you to set up costs based on general store settings or specific item settings.
- SEO (Search Engine Optimization) is a tab that allows you to customize how you appear in the Google Search Engine (i.e., title and meta description)
- Related Products will enable you to enable the display of similar items
- The Buy Now button is a button that users with existing accounts can use to buy your product using preset settings immediately.
Advanced settings like inventory tracking, product variations, and SEO are behind paywalls. But once you fill out all these details on your product, you can use product categories.
Product Category Options
Also, under the Catalog option, adding product categories is helpful for larger stores. Product categories contain different types, Enabling you to input images, the overall game, and a simple description.
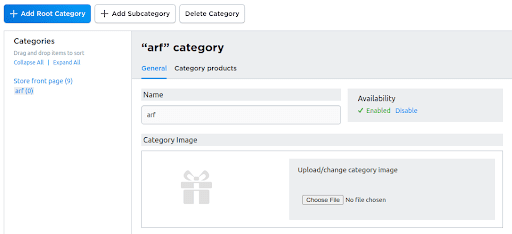
Adding product subcategories also enables you further sort measures. Sorting clothing into “shirts, shoes, and accessories” is easy and requires no coding knowledge.
You will also see the ability to sell digital gift cards under the catalog. This requires a Venture plan, which we will discuss later.
Step Four: Customizing Your Website’s Design
Ecwid’s customization options provide you with some availability to create an original website. The “configuration” section below your sales channels options will show this:
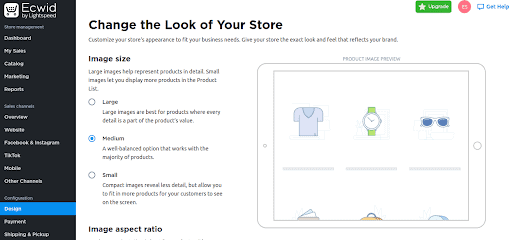
Selecting “design” reveals these options:
- Image size (for your products)
- The aspect ratio of images (depending on the image format you want to upload)
- Darken image background (if your image backgrounds are transparent)
- Product card details and layout (includes the ability to add buy now button, show a new image when hovering your mouse, and display price and product name)
- Category name position
- Product page layout
- Image gallery thumbnails (where they appear)
- Sidebar (what appears on the product page)
You can create a CSS theme based on the above customizations for consistent branding across similar sites. You can also look up fellow creators’ CSS files if you want to see what they do.
Thankfully, the whole system is straightforward enough for anyone to see results. However, consistent design elements among Ecwid sites can cause crossover.
Step Five: Accepting Online Payments and Setting Up Shipping
The last two areas of importance include establishing your payment processing and shipping rates.
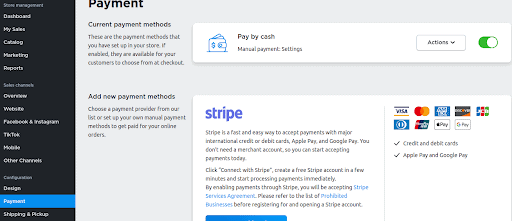
All your favorite payment options are here:
- Stripe (good for more businesses)
- Square (which offers a $1,000 incentive for waiving card transactions when starting)
- PayPal (the cheapest option)
- Manual payment methods
- Many payment alternatives
Shipping is also available through all major providers:
- USPS
- UPS
- FedEx
- DHL
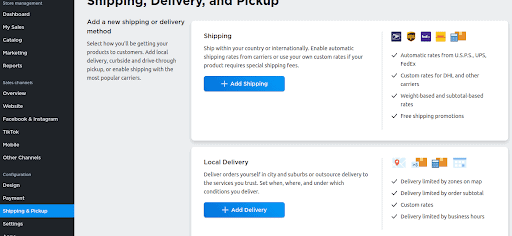
You can also offer local delivery options and self-pickup (if you have a physical storefront). Establishing payment methods and shipping is necessary to ensure your store is ready for opening day.
Ecwid Pricing – Is It Worth Paying For?
Ecwid is one of the only eCommerce platforms that offer free services. However, some compelling reasons involve enhanced social selling. Plus, the free plan is limited to 10 products.
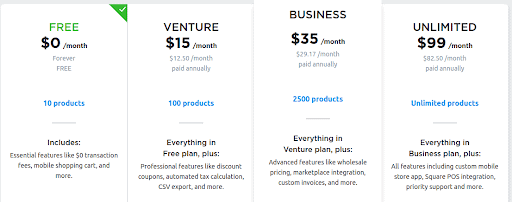
Your paid options are below:
- Venture Plan – $12.50 /mo for 100 products
- Business Plan – $29.17 /mo for 2500 products
- Unlimited Plan – $82.50 /mo for unlimited products
Access to most marketplaces (excluding social selling) is behind the Business Plan. POS selling, a big deal to many people, is hidden behind the unlimited plan through Square.
More advanced features include having a unique iOS and Android shopping app. Those are also hidden behind unlimited features. However, the general management apps are available at all paid levels.
Advertising management is behind none of these options. But the biggest reason to choose Ecwid comes down to a choice between free selling and social selling.
Conclusion – Is Ecwid Worth It?
Ecwid is a unique selling platform that could offer an excellent opportunity. There is almost no competition if you participate in social selling or want a small, free platform with minor features.
As a unique eCommerce platform, it is certainly worth checking out. But if you want more customization options for your eCommerce website, you might want other options.
